
Start a personal streaming server
Sometimes you need to spin up a cloud streaming session quickly—for testing, internal reviews, or short-notice demos. The Start Personal Streaming Server feature gives individual users a fast way to stream their VR app, without setup delays or admin support.
It’s designed for agility: no scheduling, no configuration, just one click to start streaming a ready-to-use virtual machine with your content.
What it does
The Start Personal Streaming Server button (available in the Portal web frontend) starts a temporary cloud rendering instance with:
A personal location
Pre-installed VR apps the user has access to
A 6-hour session limit
Instant launch (no scheduling)
How to start
Open the Innoactive Portal Web Frontend
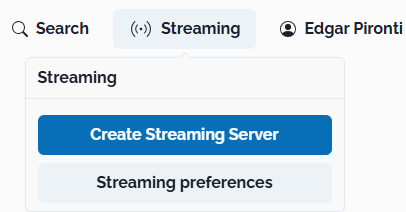
Click on Streaming on top right corner
Click Create streaming server
Personalize location and performance tier if needed

Search for your application


Click Create streaming server
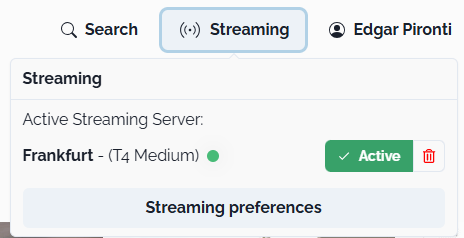
Wait for the session to initialize (1–2 minutes)

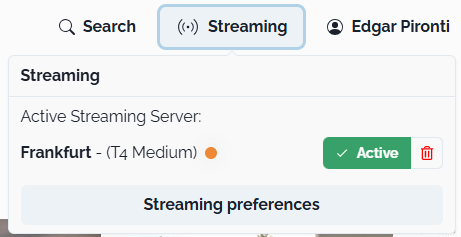
After the dot turns green, you can safely and quickly start a session on your personal streaming server!
Tips
Upload and configure your apps before starting
This setup is for short, spontaneous use only
For planned events, use Hot machine reservations instead
Related articles
- NVIDIA Omniverse
- Reserve a Hot machine with pre-installed applications
- How to prepare a streaming session in advance
- How to set up collaborative streaming sessions in Omniverse with Live Sync
- Stream Omniverse to XR headsets
- Start a personal streaming server
- How to optimize your network connection to improve your streaming experience
- How to request a new cloud rendering machine when starting a streaming session
- How to manually select a specific location for cloud rendering
- How to manually select more powerful hardware for cloud rendering
- How to find log files of Portal Desktop Client