
How to set up collaborative streaming sessions in Omniverse with Live Sync
Before reading this article, please familiarize with Innoactive capabilities regarding launch arguments and deep linking.
Now that we know how to visualize a OpenUSD file, we are ready to talk about collaborative streaming sessions in Omniverse, which means setting up a live sync session and let users from different devices easily join.
Set up a live sync session with Innoactive Link Share tool
This section explains how to generate a streaming link directly from Omniverse USD Composer using Innoactive Link Share. This is typically the first step when you want to start a collaborative streaming session based on an existing USD stage.
If you are already familiar with launching applications from Portal using deep links, this workflow follows the same principle, but is initiated directly from Omniverse.
Step-by-step
Open your USD file
Launch Omniverse USD Composer and open the USD file you want to stream.Open Innoactive Link Share
In the top menu, go to:
Window → Innoactive → Link Share
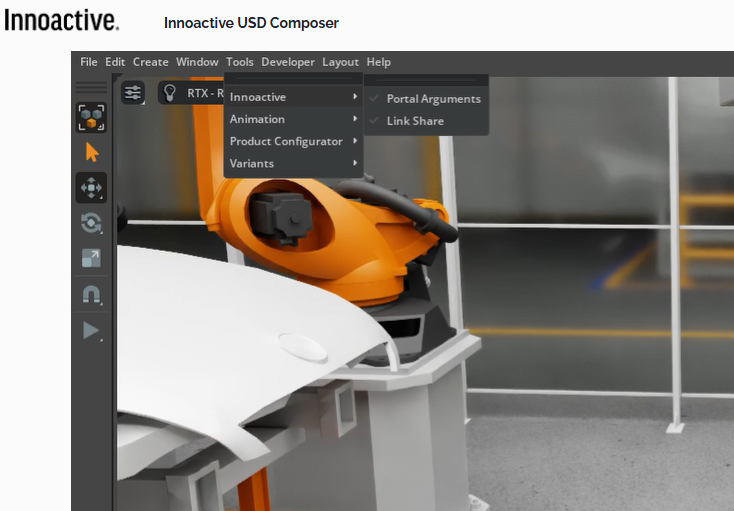
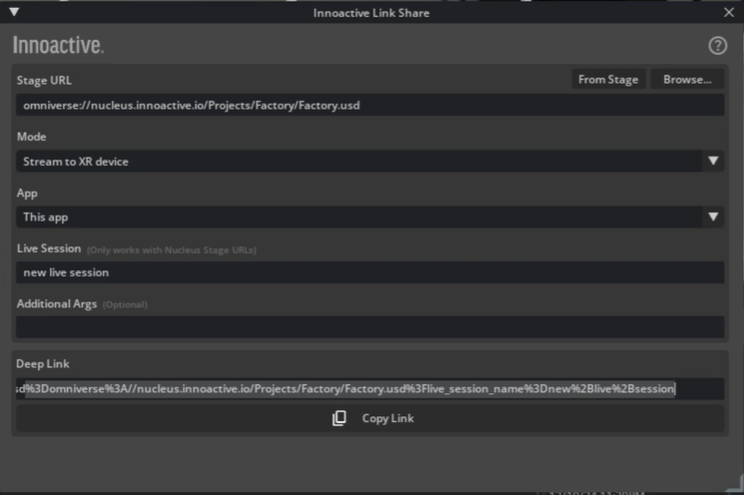
Set the Stage URL
Click From Stage to automatically use the currently opened USD file, or
Click Browse to select a different USD stage.
Select streaming mode
Set Mode to Stream to XR device or Browser.Select application
Set App to This app to stream Omniverse USD Composer itself in this example.Configure Live Session
Live sessions are only available when using a Nucleus stage URL (
omniverse://).Enter a live session name to enable real-time collaboration on the stage (this will create a live sync session from scratch in the next session launched with the deep link created - there is no need to create a live sync session in advance)
(Optional) Add additional arguments
Use Additional Args to pass custom launch parameters if required.Copy the Deep Link
Click Copy Link to generate and copy the deep link.
This link can be used in Portal to start a collaborative streaming session.
Notes
Live sessions are not available for local or HTTP-based USD files.
All participants joining via the same deep link will connect to the same live session.
Set up a live sync session building the deep link manually
In this secition we will use two browser streaming sessions as an example, but the most common use-case will involve users joining from an XR or MR headset and others from browsers or tablets. For example we demonstrated how one user can join from Apple Vision Pro and another one can collaborate from an iPad.
There are three steps to achieve a collaborative session:
Set up live sync session
Build a deep link with the session name
Use the deep link to join from several device and collaborate
Set up a live sync session
A live sync session is traditionally created from within an Omniverse application and it is linked to a OpenUSD file. As a requirement the OpenUSD file has to be hosted on Nucleus server.
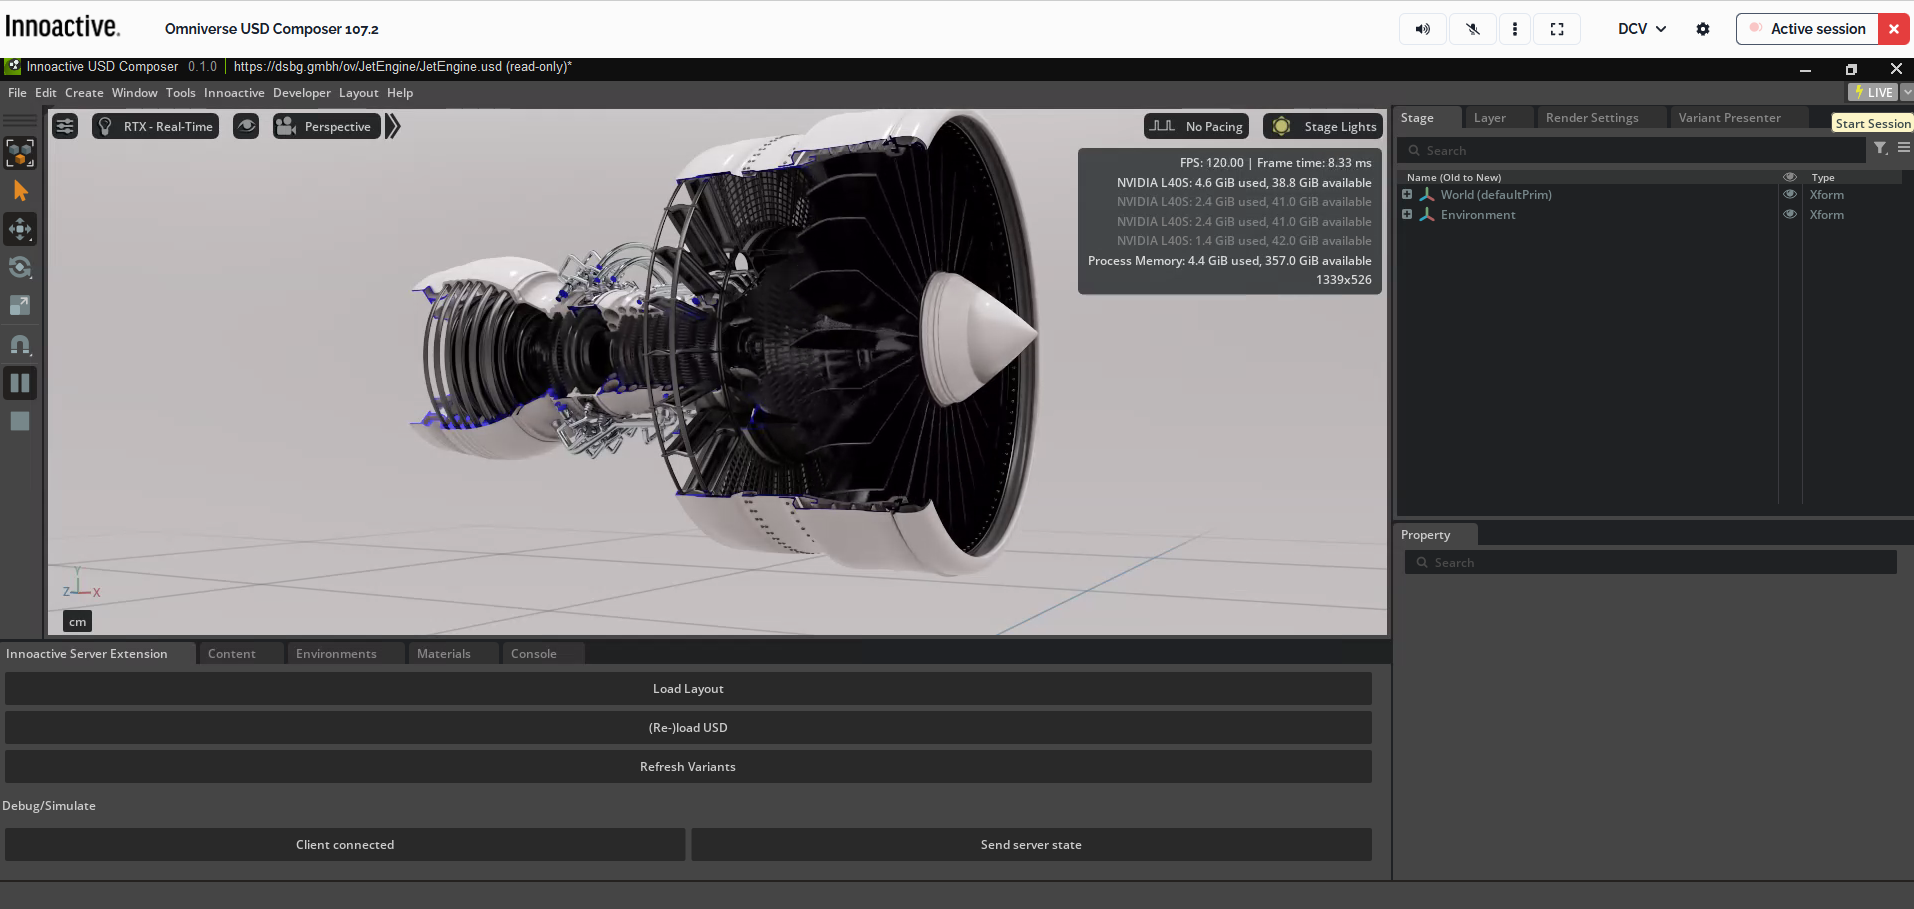
After starting an Omniverse streaming session you can click on top right corner, on the Live drop down:
And then from the menu choose Create session:
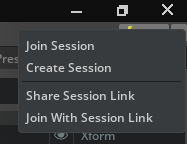
You can choose any name, for this example we used session_01

Once the session has been created, you should see the button on top right corner becoming green and some notifications from the Omniverse application.
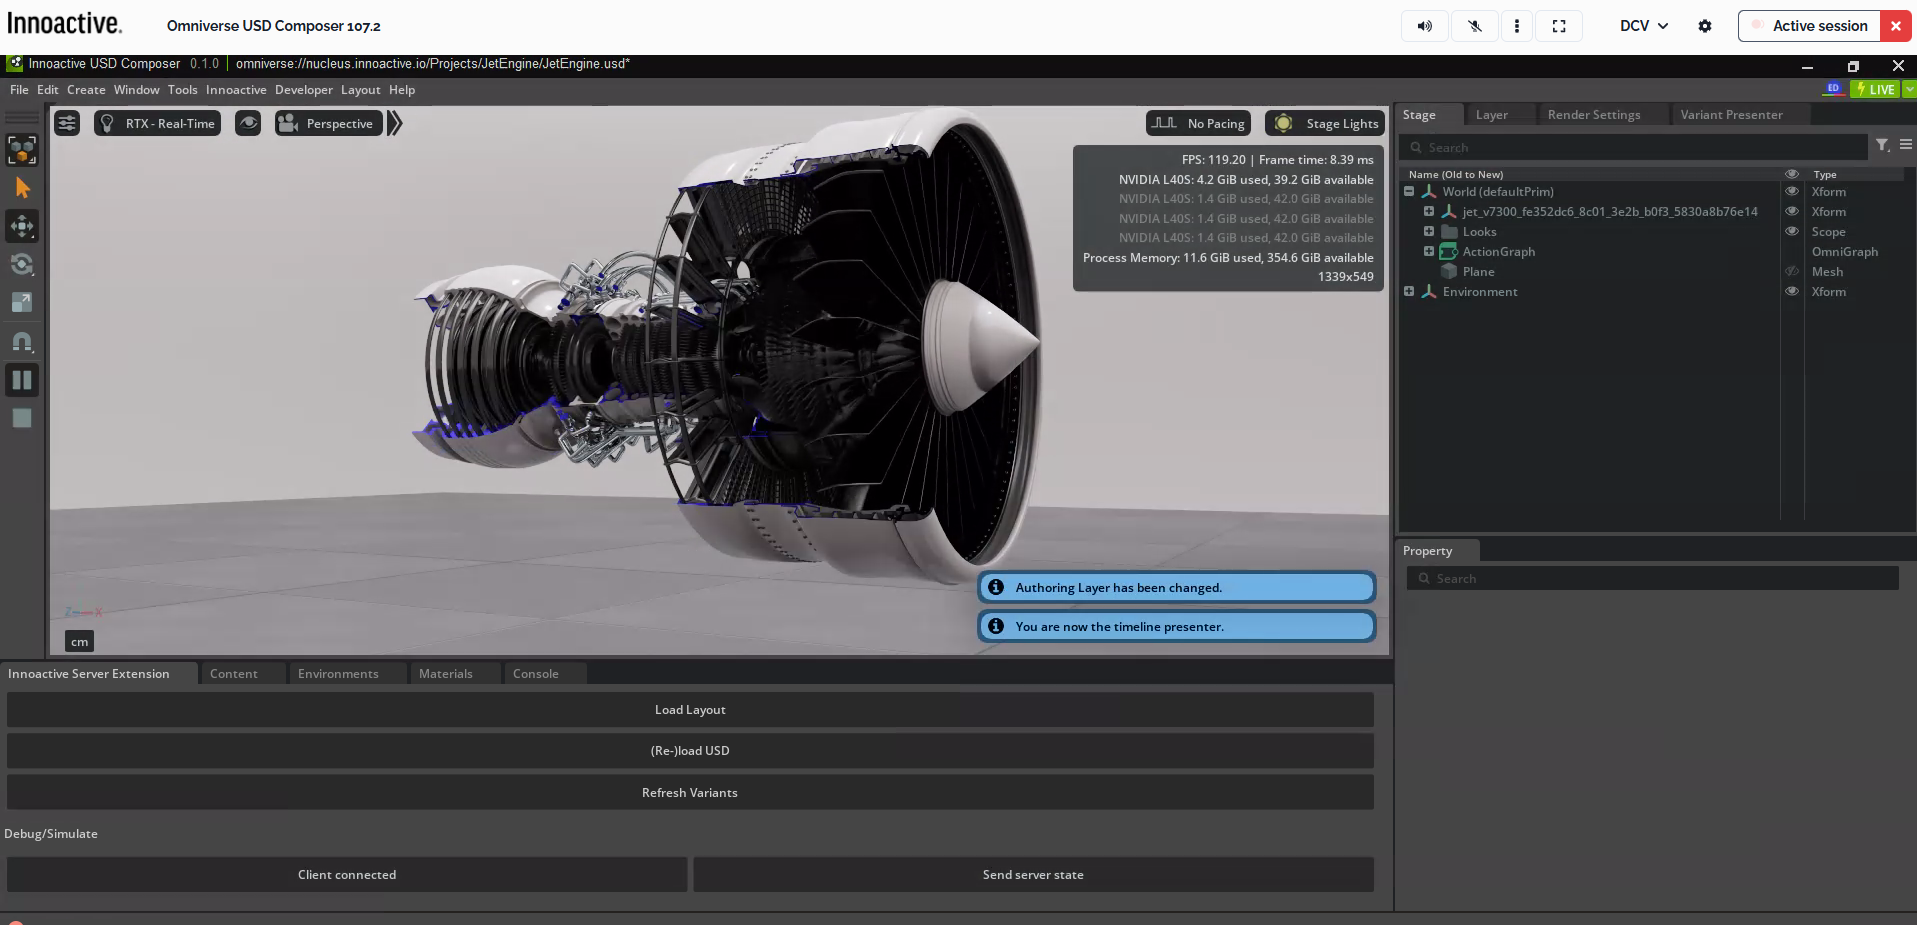
The result of creating a session is associating a new live session file on the Nucleus server to the main OpenUSD file. As long as this live session file is present on the Nuclues server, the session name can be used and the users can join the session.
Build a deep link with the session name
In the How to visualize USD files stored in a Nucleus server article, we saw how to create a deep link to stream a OpenUSD file. Starting from that, it is fairly easy to build a deep link launching a live sync session with a dedicated session name. Here is an example:
https://portal.innoactive.io/apps/d771dbd0-6bf6-4295-83cf-cc8499b52504/launch/cloud/browser?args=--OpenUSD "omniverse://nucleus.innoactive.io/Projects/JetEngine/JetEngine.OpenUSD?live_session_name=session_01"
The main note here is that the session name is not used as an additional argument of the deep link, but it is contained in the same --OpenUSD argument of the OpenUSD file on the Nucleus server and it is appended right after the OpenUSD file path as a value for live_session_name.
Use the deep link to join from several device and collaborate
Once the deep link is created and as long as this live session file is present on the Nuclues server, the deep link can be used on many devices.
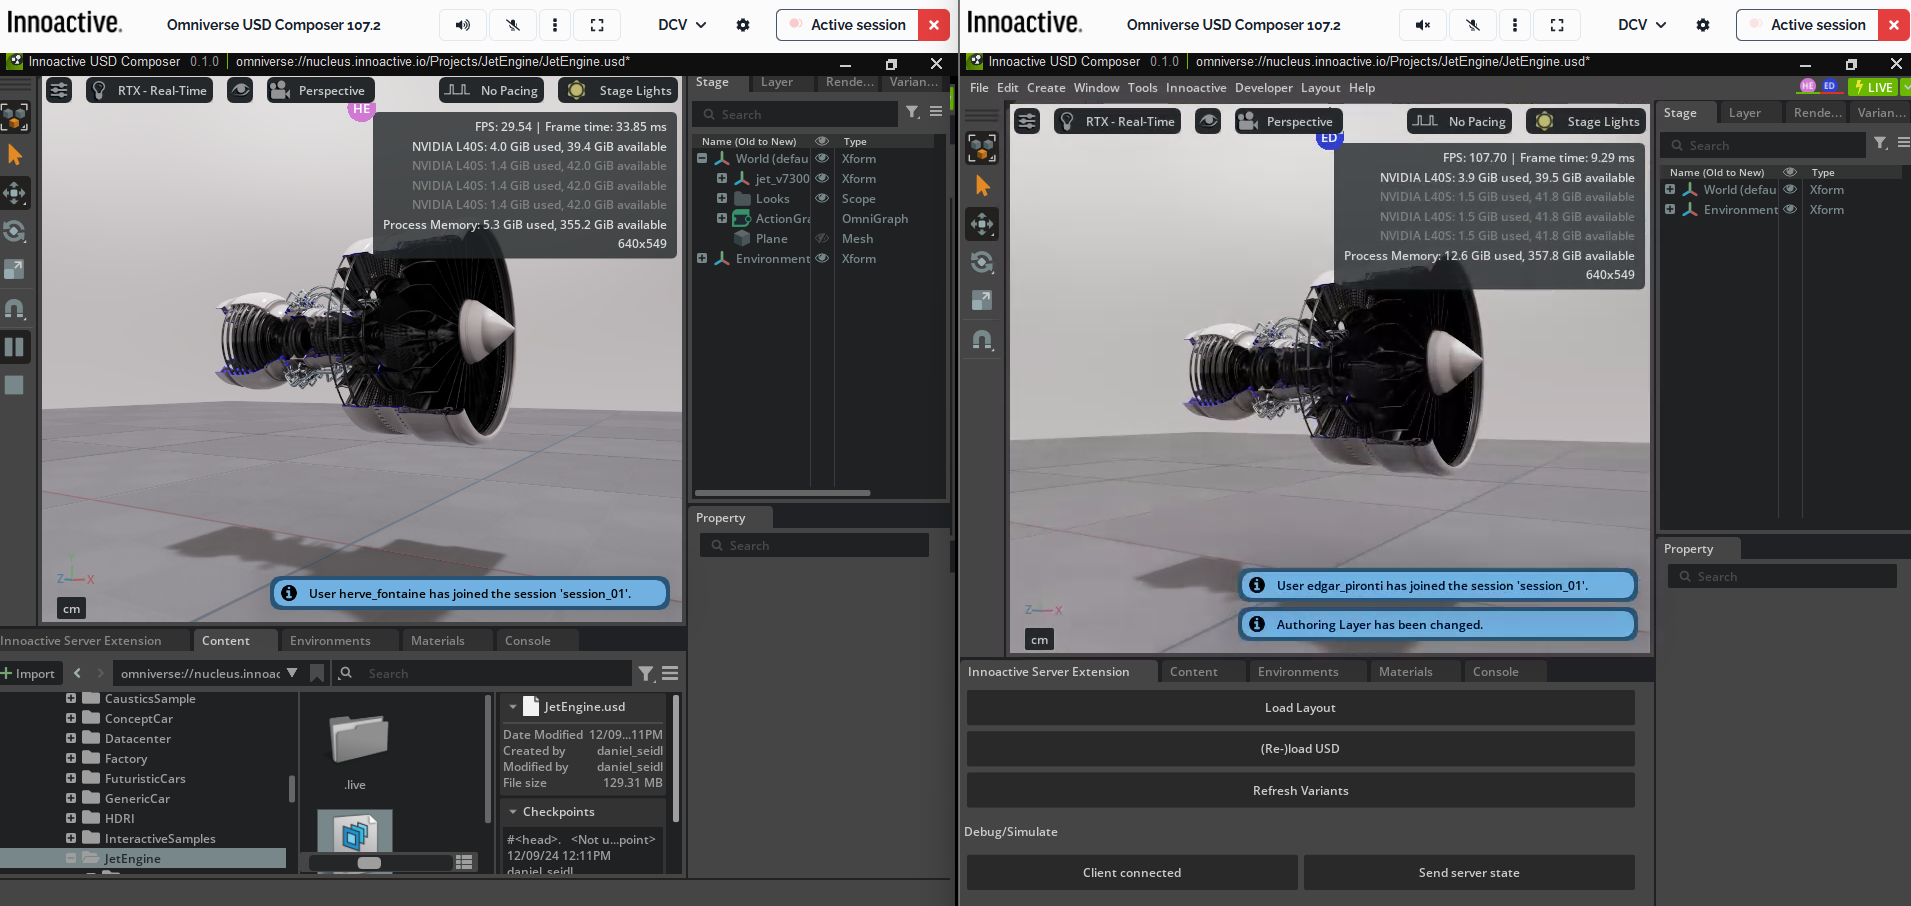
Users will be able to change variants of the OpenUSD model synchronously and start and stop timelines, so that every participant of the session can see the same details at the same time.
In our example, the deep link specifies that the steaming session will run on browsers, but changing the device in the deep link will give the users the possibility to join the same live sync session from the XR headset, for example with this deep link:
https://portal.innoactive.io/apps/d771dbd0-6bf6-4295-83cf-cc8499b52504/launch/cloud/standalone?args=--OpenUSD "omniverse://nucleus.innoactive.io/Projects/JetEngine/JetEngine.OpenUSD?live_session_name=session_01"
Related articles
- NVIDIA Omniverse
- How to visualize USD files stored in a Nucleus server
- Authoring and optimizing USD workflows for industrial use with Omniverse
- Reserve a Hot machine with pre-installed applications
- How to prepare a streaming session in advance
- How to set up collaborative streaming sessions in Omniverse with Live Sync
- Omniverse components and synergies with Innoactive Portal
- Leverage on Innoactive Portal as an Omniverse expert user
- Stream Omniverse to XR headsets
- How to create and stream your own Kit app
- Your first Omniverse streaming session in Innoactive Portal
- Start a personal streaming server
- How to request a new cloud rendering machine when starting a streaming session
- How to manually select a specific location for cloud rendering