
Image Anchoring
In this article
Overview
Innoactive Spatial supports multiple methods for aligning streamed content with the real world. Image Anchoring uses a physical printed image as a spatial reference point — the Apple Vision Pro detects the image and uses its position as the origin for all streamed content.
Method | Description |
|---|---|
World | Uses the Apple Vision Pro's built-in world alignment |
Image | Scans a physical image to act as the spatial origin |
Object | Detects a physical object to act as the spatial origin |
Tracker | Uses a physical tracker* as the spatial origin |
Image Anchoring is the recommended anchoring method when you need precise, repeatable content placement — and it is the recommended method for collaboration sessions. When multiple users each scan the same image, they all share the same spatial origin, ensuring content appears in the same position for everyone in the session.
*currently Logitech Muse Pen only
Prerequisites
Innoactive Spatial installed and running on Apple Vision Pro
A printed anchor image — 50 × 50 cm is recommended for best detection results
The default anchor image can be found in the Anchoring Settings
Good lighting conditions for reliable image detection
For collaboration: all participants must scan the same anchor image
How to enable Image Anchoring
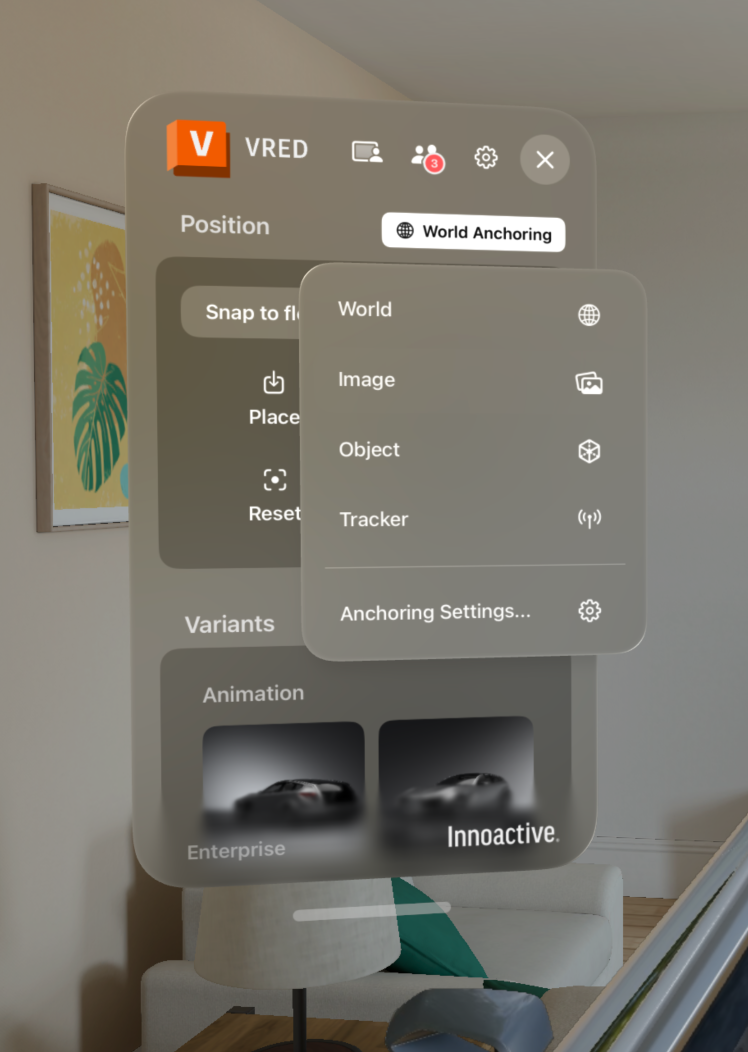
Anchoring menu
Open Innoactive Spatial on your Apple Vision Pro.
Enter a session.
Select Image as the anchoring method. (see screenshot)
Point your Apple Vision Pro at the printed anchor image.
Wait for the app to detect the image. Once detected, streamed content will align to the image's position.
Collaboration tip: For shared sessions, place the anchor image where all participants can easily scan it. Each user must complete steps 4–5 individually before the session begins.
How to change the anchor image
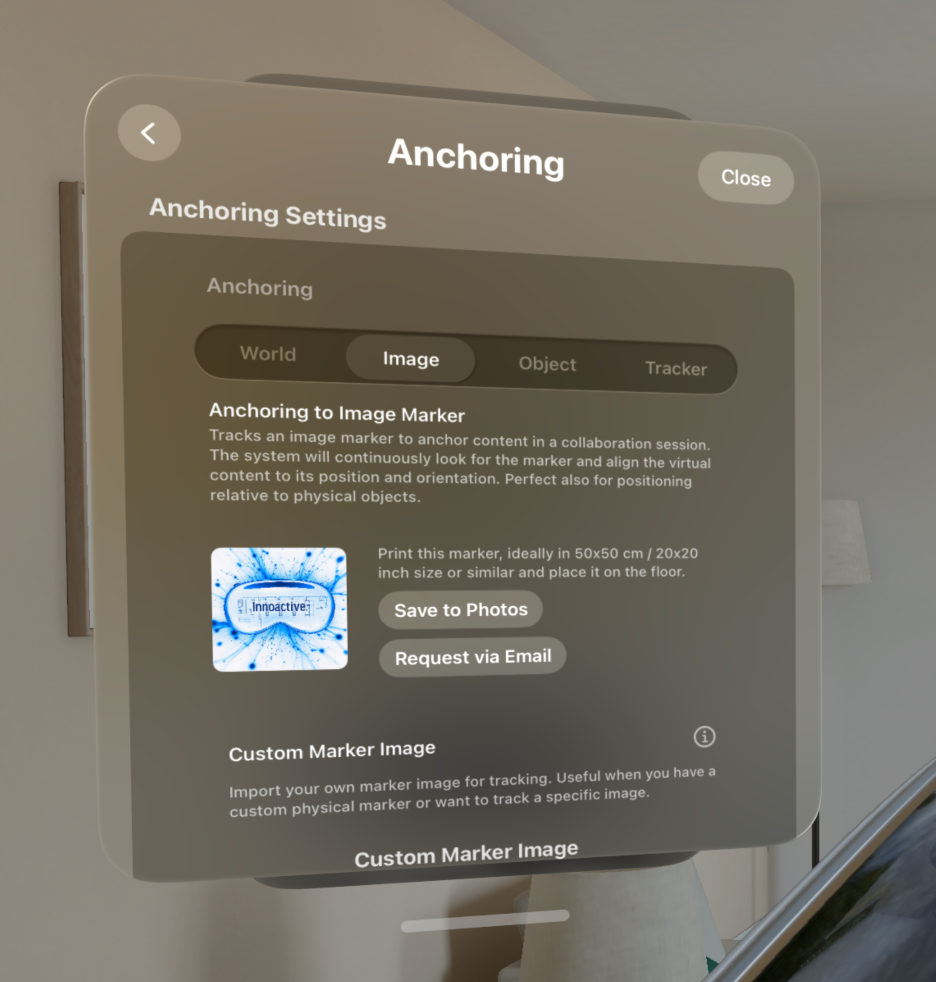
Anchoring settings
By default, Innoactive Spatial uses a predefined anchor image. If you need to use a different image:
Navigate to the Anchoring Settings. (see screenshot)
Select a different image under Custom Marker Image.
Print the selected image at the desired size — 50 × 50 cm is recommended for best results.
Follow the steps above to detect the new image.
Tip: Ensure the anchor image is flat, unobstructed, and well-lit for the fastest and most reliable detection.